Showing posts with label Cisco. Show all posts

Cisco ASA firewall basics

I am nearly at the stage for configuring the ASAs in my CCIE Security lab, well, the HQ part at least.

Before we do that though it would probably be a good idea to go through some of the more basic aspects of the Cisco ASA firewall.

Cisco ASA firewall fundamentals

Cisco ASA models

Cisco ASAs come in a two flavors, physical and virtual. The virtual one is relatively new, and is known as the ASAv ("v" for virtual, it makes sense). The physical range of ASA firewalls (5500 series) has been around for a number of years, and replaced the PIX firewalls.

The current product range starts with the 5505, which would be your typical SOHO router firewall combo, and then the range moves into the -X models, starting with the 5506-X.

The X denotes that these models are the next-generation of ASA, and come with FirePOWER, which we'll look at in a different post. So, what is the difference between the 5505 and the 5506-X? It's pretty big actually.

Despite the minor number jump, the 5506 is a far more uprated device. Here are some of the comparative stats from the Cisco website:

Cisco ASA Model

ASA 5505 / Security Plus

ASA 5506-X / Security Plus

Image
Cisco ASA 5505
Cisco ASA 5506-X
Stateful inspection throughput (max) Up to 150 Mbps 750 Mbps
Maximum concurrent sessions 10,000 / 25,000 20,000/50,000
Packets per second (64 byte) 85,000 246,900
Maximum site-to-site and IPsec IKEv1 client VPN user sessions 10 / 25 10 / 50
Maximum Cisco AnyConnect IKEv2 remote access VPN or clientless VPN user sessions 25 2 / 50
VLANs 3 (trunking disabled) / 20 (trunking enabled) 5 / 30
High-availability support Stateless A/S only (active / standby) A / S
Integrated I/O 8-port FE with 2 Power over Ethernet (PoE) ports 8 x 1 Gigabit Ethernet (GE)

As you can see, you can push a far greater amount of traffic through the 5506-X than the 5505.

Prices for the 5505 start at about £250, and go up to around £800, the one above falls into the latter price range. The 5506-X range is not much more expensive, prices start at around £400.

As you move higher up the model line, naturally the prices start to enter enterprise kind of money (lots of zeros at the end). But, again, you do get more bang for your buck.

Sizing a firewall is tricky business. You need to look at the number of users you have, both on site and remote, the number that will be connecting via VPN, both site to site, and client VPN, such as AnyConnect. You also need to look at what kind of application traffic the firewall will be passing.

For example the 5512-X could easily support around 2000 users, with around 500 of those being remote users. Prices for this are around £2300.

Basic Cisco ASA firewall configuration

Cisco ASA firewalls are anything but basic. But don't be put off by their complexity. Getting them up and running can be done in a short space of time.

Let's start off with our interfaces, and how they relate to firewall function. A firewall separates traffic between different areas. The ASA interfaces can be assigned to different areas, we will need one on the outside, connecting us to our upstream service provider, one on the inside for our users, and maybe one for our public facing servers, which is known as a DMZ, or Demilitarised Zone.

In our example below, we have an ISP, our ASA (ASAv), and our client (user) machine:

Cisco ASA basic configuration
We will, for a little while, need to use VNC to control the ASA.

Our Gi0/0 interface will be our "Outside" interface, and our Gi0/1 interface will be our "Inside" interface. There is a reason we name them these, and that is because the ASA will automatically assign a security level to these interfaces, as we will see in a moment.
Let's get started.
ISP:
Router(config)#ho ISP
ISP(config)#int fa0/0
ISP(config-if)#ip add 10.1.1.1 255.255.255.252
ISP(config-if)#no shu
ISP(config-if)#int lo0
ISP(config-if)#ip add 8.8.8.8 255.255.255.255    
ISP(config-if)#ip route 0.0.0.0 0.0.0.0 10.1.1.2
ISP(config)#
User-PC:
Router(config)#ho User1
User1(config)#int fa0/0
User1(config-if)#ip add 192.168.1.17 255.255.255.0
User1(config-if)#no shu
User1(config-if)#ip route 0.0.0.0 0.0.0.0 192.168.1.254
User1(config)#

Cisco ASA interface configuration

OK, let's configure the ASA up, starting with setting the hostname and the outside interface:

Configuring outside interface on a Cisco ASA

Now we configure the Inside interface:

Configuring inside interface on a Cisco ASA

Notice how the ASA will set the security levels according to the interface names, with 0 for the Outside interface, and 100 for the Inside interface. 0 is a "least trusted" level and 100 is the "most trusted" level. We can set these manually if we want to, using the command "security-level <0-100>".

At this stage we should have connectivity from the User1 "PC", and from the ISP:
User1#ping 192.168.1.254 
Type escape sequence to abort.
Sending 5, 100-byte ICMP Echos to 192.168.1.254, timeout is 2 seconds:
.!!!!
Success rate is 80 percent (4/5), round-trip min/avg/max = 1/7/12 ms
User1#

ISP#ping 10.1.1.2
Type escape sequence to abort.
Sending 5, 100-byte ICMP Echos to 10.1.1.2, timeout is 2 seconds:
!!!!!
Success rate is 100 percent (5/5), round-trip min/avg/max = 8/12/28 ms
ISP#

The ASAv needs to be aware of the 8.8.8.8 "server", so we can create a default route on the ASAv to do this:

Configuring a default route on an ASA

Notice that unlike traditional IOS based devices, the ASA is actually a little less clever here, we need to specify the interface, or direction, that the route affects.

Allowing SSH access to Cisco ASA

Now, let's set ourselves up to manage the ASA from our User1 "PC". Firstly we need to generate our general-keys, using the command "crypto key generate rsa modulus 1024", ideally (in production), you should use 2048:

Configuring SSH on Cisco ASA

Notice that I also set the domain name, and the version.

The rest of the commands are being shown through show commands, once I have successfully connected from User1:
User1#ssh -l stu 192.168.1.254
Password: 
Type help or '?' for a list of available commands.
ASAv> en
Password: ******
ASAv# sh run | i username
username stu password QFwZO2R.a0n6RaA/ encrypted privilege 15
ASAv# sh run | i aaa
aaa authentication ssh console LOCAL 
aaa authentication enable console LOCAL 
ASAv# sh run | i ssh
aaa authentication ssh console LOCAL 
ssh stricthostkeycheck
ssh 192.168.1.0 255.255.255.0 Inside
ssh timeout 5
ssh version 2
ssh key-exchange group dh-group1-sha1
ASAv# sh run | i management
 management-only
management-access Inside
ASAv#
We will need a user to connect with. Notice the the password gets automatically encrypted. We have two AAA commands, one for SSH access, another for enable level access. We also enable ssh access from the 192.168.1.0/24 subnet, and have allowed management access from anything behind the Inside interface.

Now we can work a little easier. The final step it to get the User1 PC to access the 8.8.8.8 server out on the Internet. To do this the ASA needs to perform a bit of Network Address Translation (NAT).

Internet access for inside hosts on a Cisco ASA

Let's give access for our inside hosts. To do this does not take many steps, we just need to create a network to match everything, and then NAT this:
ASAv(config)# object network OBJ_OUTSIDE
ASAv(config-network-object)# subnet 0.0.0.0 0.0.0.0
ASAv(config-network-object)# exi
ASAv(config)# nat (Inside,Outside) source dynamic OBJ_OUTSIDE interface
ASAv(config)# 
Although ping does not work, telnet does:
ASAv(config)# exi
ASAv# exi
[Connection to 192.168.1.254 closed by foreign host]
User1#ping 8.8.8.8
Type escape sequence to abort.
Sending 5, 100-byte ICMP Echos to 8.8.8.8, timeout is 2 seconds:
.....
Success rate is 0 percent (0/5)
User1#telnet 8.8.8.8
Trying 8.8.8.8 ... Open


Password required, but none set

[Connection to 8.8.8.8 closed by foreign host]
User1#
We can prove that this works, by setting a password on the ISP router:
ISP(config)#line vty 0 4
ISP(config-line)#password 802101
ISP(config-line)#exi
ISP(config)#enable password 802101
ISP(config)#

User1#telnet 8.8.8.8
Trying 8.8.8.8 ... Open


User Access Verification

Password: 
ISP>en
Password: 
ISP#who
    Line       User       Host(s)              Idle       Location
   0 con 0                idle                 00:00:24   
*  2 vty 0                idle                 00:00:00 10.1.1.2

  Interface    User               Mode         Idle     Peer Address

ISP#
So, you can see that the ASAv has performed NAT for User1. We can check this on the ASAv:


So, telnet worked fine, what about http requests? Well, the ASAv will perform NAT (well, PAT to be precise) for us. We can see this by setting up the ISP router to be an HTTP server:
ISP(config)#ip http server
ISP(config)#

User1#telnet 8.8.8.8 80
Trying 8.8.8.8, 80 ... Open
get
HTTP/1.1 400 Bad Request
Date: Sat, 05 Sep 2015 14:28:30 GMT
Server: cisco-IOS
Accept-Ranges: none

400 Bad Request
[Connection to 8.8.8.8 closed by foreign host]
User1#

As you can see, it does not take long to get up and running with an ASA. Now that we have had our little introduction to ASAs, I can start configuring them up in my lab (in a day or two).

New Networking forum now live

Hi all!

I have now added a forum to the website. It's primary for Cisco certifications, from CCNA through CCNP, up to CCIE.
Cisco Certification forum

I can (and will) add other, relevant, topics, so do please feel free to request anything you'd like to see.

It is for free discussion of all things networking, including virtualization (UNetLab, GNS3 etc) and there will be a place for off-topic discussion (keep it clean).


Please note that it is not for asking, or posting, dumps or copyrighted material. 

You can visit the forum by clicking the link in the navigation bar above, or by visiting http://forum.802101.com/.

Thanks!

Riddle: What has two thumbs and five digits?

You can probably guess that I got "that email" from Cisco this morning. So it's the moment of truth.

Did I pass or fail?

I woke up this morning feeling tired. One of my boys climbed into bed with me, wriggled around for a bit then made me get up to make him breakfast. The other one is still asleep, unusual for him, but we did stay out really late last night. Part of me wanted to stay in bed, after all in a Schrodinger's cat kind of way, if I don't know that I have failed, that means I have passed, right? I think that's how it works.

Nevertheless, I am still nervous about the result.

Nervous on Airplane

I was not sure whether I'd get an email from Cisco by now, mainly because it is the weekend, so I would have allowed until Monday to hear back.

They sent the email at just after 5am this morning.

CCIE results

The email itself just directs you to the CCIE webpage.
This is what greets me:

CCIE results

Clicking on the "Pass" link takes us to another page:

CCIE results

So there we go. What's got two thumbs and five digits?

This guy.

I am CCIE.

CCIE certified logo

I did it. I would like to know that actual scores, but now they are irrelevant.

I have the digits. Mission accomplished.

It's time to celebrate today. I can rest, I can enjoy time with my family again. I can spend my holiday (at the end of the month) relaxing and enjoying. This will be nice as I am sure my family would prefer me not to be studying for the fourth year in a row when we are on holiday.

I feel so relieved now. I have got some friends coming over later for a BBQ, so it's time to kick back and relax.

Once again I'd like to thank all of you who have encouraged me along this journey. It's not over yet, but I have reached a massive milestone.

So thank you guys for the support. I have the digits, and don't feel like I have let you guys down, as well as myself.

Time to go outside and smell the roses!

Got bored. Got CCDA. CCDP next.

Studying for CCIE can get a little bit boring. It's a fairly constant rotation of reading, more reading, re-reading, labbing, bit more labbing, and then loads more labbing.

So, I decided to take a little side-road down this long path towards CCIE-dom, and get my CCDP. Because I don't have the CCIE yet (which would fulfil one of the prerequisites), I have got to do the CCDA first. FYI the prerequisites are a valid CCENT, CCNA Routing and Switching, or any CCIE.

So I did it.

Arrived about half an hour early, did all the paper work and pictures, triple signatures, sat the exam, and passed.


I really do not think that it is a hard exam - certainly not when I am in the midst of CCIE-study. There are a number of questions about routing protocol specifics, which are very easy, many of the questions just need a bit of logic to get through them, the rest were all answered by reading the study guide.

The study guide is very well written, it's clear and concise and I finished it within a week.


You can grab it from Amazon by clicking the picture above.
So now I have this, I can sit the CCDP exam, which should be a little bit more fun.

By the way, when did Associate level exams cost the same as Professional level? The CCDA exam cost £151 as does the CCDP. It was £135 for a CCNP exam back in 2012. CCNA was £123 in 2009, are all associate and professional exams the same cost now?

Anyway, I am off on a tour of the US offices for a few days, so lot's of time in planes and airports, armed with my Kindle. I have already started reading the "simplified guide", which is pretty good so far. I wouldn't say it's got all the depth I will probably need for the CCDP exam, but its a good place to start.


I also have the Cisco CCDP guide:


I have been skimming through this at work, and again it's very good. I should be able to finish the the simplified guide on my first flight (London to Philadelphia), and then get through the official one when going from Philly to Arizona, and then from Arizona to Boston. If that's not enough time then I can finish it on the flight back to the UK (though that's a over-night flight, so I might sleep instead).

Anyway, plenty of time to get up to scratch for the CCDP exam at the end of this month, before it's back to the CCIE studies. Then it'll be three months of labbing before the CCIE lab exam in July.

I really should start packing for my trip now. Have a good weekend all.
CCIE R&S written (400-101) passed

CCIE R&S written (400-101) passed

After months of cramming I finally got around to sitting the CCIE Routing and Switching written exam (400-101).

I got to the testing centre nice and early, and sat waiting to be taken through to the room. I wasn't feeling all that nervous, the only nerves were all around the cost of having to resit it if I failed.

Once in the room we go through all the usual identity checks, drivers license, something else with signature, do two more signatures and have my photo taken. Then we are in the room and I sit down.

The invigilator signs in and we wait for the system to start. It hangs, and they have to call up the support people. This is when I start to get nervous, well, more anxious than nervous. I really don't want to wait for another day of the system decides to muck about.

I am told that this happened a few days ago, and they had to wait twenty minutes for resolution. It's cold in the room, and I could do with a cup of coffee.

Thankfully they get through pretty quickly, and get the issue sorted.

The exam starts.

Obviously I can't say what was tested on the exam (I signed the NDA, so I won't discuss the questions), but just compare the written objectives to the lab objectives and you can get an idea of what's more likely to crop up on the written.

The format is nothing new, 100 or so questions, some single choice answers, some multiple choice answers, and a whole bunch of drag and drops.

I was finished in about half an hour.
I have had issues in the past where the score report is not shown on the screen when its all done, this has happened more than once, and quite frankly, is very annoying. This didn't happen this time, and my score, which was pretty good was shown on the screen.

I got up from my seat, ready to grab my things and get back to the office, forgetting that I needed to fill in the survey at the end of the quiz.

Survey done, sign out, grab stuff and head off.

Now it's on to studying for the lab.

I have just bought a 26GB 1U server to run ESXi and IOU on, which should serve nicely for when I do the CCIE Service Provider exams (which is my plan for after finishing the Routing and Switching).

One step closer!

Default routing with PPP

Creating a default route within a standard PPP link is not complex, but it is not obvious either. We are not running an IGP, so we cannot redistribute a static default route, nor can we do, say, "default-information originate". However, it is just a one-line command, you just need to know what you are looking for!

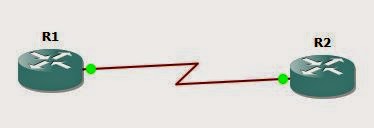
We start with a couple of routers.

PPP default routing

The goal will be for R1 to have a default route in it's routing table, pointing to R2. We start with a basic config:
R1(config)#int s3/0
R1(config-if)#no shut
R1(config-if)#encapsulation ppp
R1(config-if)#ip add 10.1.1.1 255.255.255.0

R2(config)#int s3/0
R2(config-if)#encap ppp
R2(config-if)#ip add 20.1.1.1 255.255.255.0
R2(config-if)#no shut
Now we need R1 to have a default route. We do not have an IGP running between the two, so we cannot do any redistribution or anything like that. We need to look at R1 and see what options we have.
R1(config-if)#ppp ?
  accm              Set initial Async Control Character Map
  accounting        Set PPP network accounting method
  acfc              Options for HDLC Address & Control Field Compression
  authentication    Set PPP link authentication method
  authorization     Set PPP network authorization method
  bcp               Set BCP negotiation options
  bridge            Enable PPP bridge translation
  caller            Caller option when no CLID is available
  chap              Set CHAP authentication parameters
  direction         Override default PPP direction
  disconnect-cause  Set disconnect-cause code
  dnis              Authentication via DNIS before LCP
  eap               Set EAP authentication parameters
  encrypt           Enable PPP encryption
  ipcp              Set IPCP negotiation options
  iphc              Set IPCP Header Compression control options
  ipv6cp            Set IPV6CP negotiation options
  lcp               PPP LCP configuration
  link              Set miscellaneous link parameters
  loopback          PPP loopback options
  max-bad-auth      Allow multiple authentication failures
  max-configure     Number of conf-reqs sent before assuming peer is unable to

R1(config-if)#
We have one called "ipcp". This stands for Internet Protocol Control Protocol. IPCP looks after IP addressing on a PPP link. Within the options for "ppp ipcp" we have:
R1(config-if)#ppp ipcp ?
  accept-address      Accept any non zero IP address from our peer
  address             Additional ipcp address options
  dns                 Specify DNS negotiation options
  header-compression  IPCP header compression option
  ignore-map          Ignore dialer map when negotiating peer IP address
  mask                Specify subnet mask negotiation options
  no-renegotiation    Do not allow client to renegotiate IPCP
  predictive          Predict peers IPCP requests/replies
  route               Install default route thru negotiated peer IP address
  username            Configure how usernames are handled
  wins                Specify WINS negotiation options

R1(config-if)#
So, ppp ipcp route looks like a winner!
R1(config-if)#ppp ipcp route ?
  default  Install default route thru negotiated peer IP address

R1(config-if)#
So the complete command will be:
R1(config-if)#ppp ipcp route default
Let's see what this gets us!
R1(config-if)#do sh ip route | b Gateway
Gateway of last resort is 20.1.1.1 to network 0.0.0.0

S*    0.0.0.0/0 [1/0] via 20.1.1.1
      10.0.0.0/8 is variably subnetted, 2 subnets, 2 masks
C        10.1.1.0/24 is directly connected, Serial3/0
L        10.1.1.1/32 is directly connected, Serial3/0
      20.0.0.0/32 is subnetted, 1 subnets
C        20.1.1.1 is directly connected, Serial3/0
R1(config-if)#
Let's add a loopback interface to R2 and check that we have connectivity:
R2(config-if)#int lo0
R2(config-if)#ip add 2.2.2.2 255.255.255.255
R2(config-if)#

R1(config-if)#do ping 2.2.2.2
Type escape sequence to abort.
Sending 5, 100-byte ICMP Echos to 2.2.2.2, timeout is 2 seconds:
!!!!!
Success rate is 100 percent (5/5), round-trip min/avg/max = 92/113/148 ms
R1(config-if)#
Nice. A little one-liner and we have a default route between two disparate networks.

Poor ASA site to site VPN performance? It could be DNS!

I have been troubleshooting an interesting issue recently, with poor performance on a site to site (L2L) VPN between two sites. The sites are very close, say about 20 miles from each other, with a decent number of users in both sites. The VPNs are established, and encrypting and decrypting traffic ok.

The problem is that the performance is pretty bad. Site B cannot stream media from the Site A, accessing file shares is slow, and access to other things is also slow.

Naturally I looked at the VPN first, the flow of packets looked fine, not obvious lags there, and as the tunnels were up we could eliminate ISAKMP and IPSec from the list of possible issues.

No other sites are affected by this slowness, Site A is our main site with multiple VPNs coming into it.

We logged a call with the ISP for Site B and they reported no issues. So I widened the search. Watching the logs go past I could see a number of failed DNS queries to the root hints servers from the domain controller at Site B:
Dropped UDP DNS reply from OUTSIDE_PRIMARY:199.7.87.1/53 to INSIDE:x.x.x.x/63095; packet length 697 bytes exceeds configured limit of 512 bytes
Dropped UDP DNS reply from OUTSIDE_PRIMARY:125.19.40.90/53 to INSIDE:x.x.x.x/63095; packet length 697 bytes exceeds configured limit of 512 bytes
Dropped UDP DNS reply from OUTSIDE_PRIMARY:194.0.9.1/53 to INSIDE:x.x.x.x/62464; packet length 618 bytes exceeds configured limit of 512 bytes
This shouldn't directly affect site to site traffic, it would certainly affect external traffic (though no reports of slow external traffic were reported), but it certainly wouldn't hurt to fix this.
Under Configuration -> Firewall -> Objects -> Inspect maps is an entry for DNS. Highlighting this we can see that the default Message Length Maximum is set to 512. So I increased this to 1024 and the errors were not logged anymore.

Cisco ASA DNS inspect default map


For the CLI user this is set with:
policy-map type inspect dns preset_dns_map
 parameters
  message-length maximum 1024
policy-map global_policy
 class inspection_default
  inspect dns preset_dns_map 
Immediately file access between sites was improved and video streaming was usable again.

So if you are having poor site to site VPN issues, this is worth checking out.

BGP Load Balancing with Cisco IOS and Junos

Today we are going to do some BGP load balancing between a Cisco router and a Juniper router.

We have a very simple topology:


The Juniper router (JUNOS1) is called NewYork and the Cisco router (R1) is called London.

We have two connections between them 1.1.1.1/24 on the Juniper to 1.1.1.2/24 on the Cisco, and 2.2.2.1 on the Juniper to 2.2.2.2 on the Cisco. We will be using AS 65000 for the BGP AS.

For the Juniper basic configuration please check out these two posts:

Juniper router emulation in GNS3
Basic Juniper Router commands

What is BGP Load Balancing?

Load balancing can use two or more connections to send data to the same destination. Load balancing in BGP requires that we enable multi-pathing, so that the router knows that it can use more than one path at a time.

We will start with the basic BGP configuration and from there advertise a loopback network on each side, then we will set up multi-pathing.

Cisco IOS BGP setup

I won't explain all the Cisco steps as they shouldn't be anything new - but there are links to my book here. Shameless plug I know!
London(config)#router bgp 65000
London(config-router)#neighbor 1.1.1.1 remote-as 65000
London(config-router)#neighbor 2.2.2.1 remote-as 65000
London(config-router)#exit
London(config)#exit
London#

Juniper JunOS BGP setup

For the JunOS set up we will create the BGP AS under routing options, and then create a group called Cisco to add the two peerings to the Cisco router to, setting the AS number to match our own, and the type to be internal (iBGP).
root@NewYork> configure
Entering configuration mode

[edit]
root@NewYork# set routing-options autonomous-system 65000
root@NewYork# set protocols bgp group Cisco neighbor 1.1.1.2
root@NewYork# set protocols bgp group Cisco neighbor 2.2.2.2
root@NewYork# set protocols bgp group Cisco peer-as 65000
root@NewYork# set protocols bgp group Cisco type internal
root@NewYork# commit
commit complete

[edit]
root@NewYork#
At this stage our BGP peers should come up:
London#
*Apr 21 13:19:18.087: %BGP-5-ADJCHANGE: neighbor 1.1.1.1 Up
London#
*Apr 21 13:19:22.227: %BGP-5-ADJCHANGE: neighbor 2.2.2.1 Up
London#
We can confirm this by looking at the bgp neighbors on the NewYork router:
root@NewYork> show bgp neighbor
Peer: 1.1.1.2+46617 AS 65000   Local: 1.1.1.1+179 AS 65000
  Type: Internal    State: Established    Flags: 
  Last State: OpenConfirm   Last Event: RecvKeepAlive
  Last Error: None
  Options: 
  Holdtime: 90 Preference: 170
  Number of flaps: 0
  Peer ID: 2.2.2.2         Local ID: 1.1.1.1      Active Holdtime: 90
  Keepalive Interval: 30         Peer index: 0   
  BFD: disabled, down
  NLRI for restart configured on peer: inet-unicast
  NLRI advertised by peer: inet-unicast
  NLRI for this session: inet-unicast
  Peer supports Refresh capability (2)
  Stale routes from peer are kept for: 300
  Peer does not support Restarter functionality
  Peer does not support Receiver functionality
  Peer supports 4 byte AS extension (peer-as 65000)
  Peer does not support Addpath
  Table inet.0 Bit: 10000
    RIB State: BGP restart is complete
    Send state: in sync
    Active prefixes:              1
    Received prefixes:            1     
    Accepted prefixes:            1
    Suppressed due to damping:    0
    Advertised prefixes:          0
  Last traffic (seconds): Received 15   Sent 22   Checked 40  
  Input messages:  Total 8 Updates 2  Refreshes 0  Octets 226
  Output messages: Total 7 Updates 0  Refreshes 0  Octets 173
  Output Queue[0]: 0

Peer: 2.2.2.2+179 AS 65000     Local: 2.2.2.1+51595 AS 65000
  Type: Internal    State: Established    Flags: 
  Last State: OpenConfirm   Last Event: RecvKeepAlive
  Last Error: None
  Options: 
  Holdtime: 90 Preference: 170
  Number of flaps: 0
  Peer ID: 2.2.2.2         Local ID: 1.1.1.1      Active Holdtime: 90
  Keepalive Interval: 30         Peer index: 1   
  BFD: disabled, down
  NLRI for restart configured on peer: inet-unicast
  NLRI advertised by peer: inet-unicast
  NLRI for this session: inet-unicast
  Peer supports Refresh capability (2)
  Stale routes from peer are kept for: 300
  Peer does not support Restarter functionality
  Peer does not support Receiver functionality
  Peer supports 4 byte AS extension (peer-as 65000)
  Peer does not support Addpath
  Table inet.0 Bit: 10000
    RIB State: BGP restart is complete
    Send state: in sync
    Active prefixes:              0
    Received prefixes:            1
    Accepted prefixes:            1
    Suppressed due to damping:    0
    Advertised prefixes:          0
  Last traffic (seconds): Received 13   Sent 21   Checked 35  
  Input messages:  Total 5 Updates 2  Refreshes 0  Octets 135
  Output messages: Total 6 Updates 0  Refreshes 0  Octets 154
  Output Queue[0]: 0

root@NewYork> 

Advertising BGP prefixes in Cisco IOS and Juniper JunOS

Now we can add our loopback interfaces, and advertise them into BGP:
London(config)#int lo0
London(config-if)#ip add 172.20.1.1 255.255.255.0
London(config-if)#router bgp 65000
London(config-router)#network 172.20.1.0 mask 255.255.255.0
London(config-router)#
NewYork sees the route coming from both peering sessions, it prefers the one with the lower IP address (denoted by a *):
root@NewYork> show route
inet.0: 5 destinations, 6 routes (5 active, 0 holddown, 0 hidden)
+ = Active Route, - = Last Active, * = Both

1.1.1.0/24         *[Direct/0] 01:08:36
                    > via em0.0
1.1.1.1/32         *[Local/0] 01:08:36
                      Local via em0.0
2.2.2.0/24         *[Direct/0] 01:08:36
                    > via em1.0
2.2.2.1/32         *[Local/0] 01:08:36
                      Local via em1.0
172.20.1.0/24      *[BGP/170] 00:01:20, MED 0, localpref 100
                      AS path: I
                    > to 1.1.1.2 via em0.0
                    [BGP/170] 00:01:20, MED 0, localpref 100
                      AS path: I
                    > to 2.2.2.2 via em1.0

root@NewYork>
Now let's add a loopback interface on the NewYork router and advertise it in BGP as well. The process isn't exactly as straight forward in JunOS, all advertisement is done through policy statements, which is then used to export (advertise to BGP neighbors) based on the specified group:
root@NewYork# set int lo0 unit 0 family inet address 192.168.1.1/24
root@NewYork# edit policy-options                                      

[edit policy-options]
root@NewYork# set policy-statement ADVERTISE_LO0 from interface lo0    
root@NewYork# set policy-statement ADVERTISE_LO0 then accept 

[edit policy-options]
root@NewYork# exit 

[edit]
root@NewYork# set protocols bgp group Cisco export ADVERTISE_LO0       

[edit]
root@NewYork# commit 
commit complete

[edit]
root@NewYork# 

And if all is well then the London router should see the new prefix:
London#sh ip route | beg Gate
Gateway of last resort is not set

      1.0.0.0/8 is variably subnetted, 2 subnets, 2 masks
C        1.1.1.0/24 is directly connected, GigabitEthernet1/0
L        1.1.1.2/32 is directly connected, GigabitEthernet1/0
      2.0.0.0/8 is variably subnetted, 2 subnets, 2 masks
C        2.2.2.0/24 is directly connected, GigabitEthernet2/0
L        2.2.2.2/32 is directly connected, GigabitEthernet2/0
      172.20.0.0/16 is variably subnetted, 2 subnets, 2 masks
C        172.20.1.0/24 is directly connected, Loopback0
L        172.20.1.1/32 is directly connected, Loopback0
B     192.168.1.0/24 [200/0] via 1.1.1.1, 00:00:15
London#
It does, again choosing the router with the lower IP address. Now let's set up load balancing.

Enabling load balancing for BGP in Cisco IOS

Enabling load balancing in BGP on Cisco IOS is as simple as enabling the maximum-paths option.
London(config-router)#maximum-paths ibgp 2
London(config-router)#do sh ip route | beg Gate
Gateway of last resort is not set

      1.0.0.0/8 is variably subnetted, 2 subnets, 2 masks
C        1.1.1.0/24 is directly connected, GigabitEthernet1/0
L        1.1.1.2/32 is directly connected, GigabitEthernet1/0
      2.0.0.0/8 is variably subnetted, 2 subnets, 2 masks
C        2.2.2.0/24 is directly connected, GigabitEthernet2/0
L        2.2.2.2/32 is directly connected, GigabitEthernet2/0
      172.20.0.0/16 is variably subnetted, 2 subnets, 2 masks
C        172.20.1.0/24 is directly connected, Loopback0
L        172.20.1.1/32 is directly connected, Loopback0
B     192.168.1.0/24 [200/0] via 2.2.2.1, 00:00:02
                     [200/0] via 1.1.1.1, 00:00:02
London(config-router)#do sh ip bgp
BGP table version is 5, local router ID is 2.2.2.2
Status codes: s suppressed, d damped, h history, * valid, > best, i - internal,
              r RIB-failure, S Stale, m multipath, b backup-path, x best-external, f RT-Filter
Origin codes: i - IGP, e - EGP, ? - incomplete

   Network          Next Hop            Metric LocPrf Weight Path
*> 172.20.1.0/24    0.0.0.0                  0         32768 i
*mi192.168.1.0      1.1.1.1                       100      0 i
*>i                 2.2.2.1                       100      0 i
London(config-router)#
So our London router has now installed two paths into the routing table, courtesy of the maximum-paths command. Let's configure the same on the NewYork router.

Enabling load balancing for BGP in Juniper JunOS

Similarly to the Cisco IOS all we need to do with JunOS is to enable multipath under our BGP peer group:
root@NewYork# edit protocols bgp group Cisco
[edit protocols bgp group Cisco]
root@NewYork# set multipath 

[edit protocols bgp group Cisco]
root@NewYork# exit 

[edit]
root@NewYork# commit 
commit complete

[edit]
root@NewYork# exit 
Exiting configuration mode

root@NewYork> show route 172.20.1.0    

inet.0: 7 destinations, 8 routes (7 active, 0 holddown, 0 hidden)
+ = Active Route, - = Last Active, * = Both

172.20.1.0/24   *[BGP/170] 00:24:56, MED 0, localpref 100, from 1.1.1.2
                   AS path: I
                   to 1.1.1.2 via em0.0
                 > to 2.2.2.2 via em1.0
                 [BGP/170] 00:11:42, MED 0, localpref 100
                   AS path: 
                 > to 2.2.2.2 via em1.0

root@NewYork> show route 172.20.1.0 detail 

inet.0: 7 destinations, 8 routes (7 active, 0 holddown, 0 hidden)
172.20.1.0/24 (2 entries, 1 announced)
        *BGP    Preference: 170/-101
                Next hop type: Indirect
                Address: 0x9408078
                Next-hop reference count: 2
                Source: 1.1.1.2
                Next hop type: Router, Next hop index: 520
                Next hop: 1.1.1.2 via em0.0
                Next hop type: Router, Next hop index: 554
                Next hop: 2.2.2.2 via em1.0, selected
                Protocol next hop: 1.1.1.2
                Indirect next hop: 9384000 131071
                Protocol next hop: 2.2.2.2
                Indirect next hop: 93840e8 131070
                State: 
                Local AS: 65000 Peer AS: 65000
                Age: 18:57  Metric: 0  Metric2: 0 
                Task: BGP_65000.1.1.1.2+19079
                Announcement bits (2): 0-KRT 3-Resolve tree 1 
                AS path: I
                Accepted Multipath
                Localpref: 100          
                Router ID: 172.20.1.1
         BGP    Preference: 170/-101
                Next hop type: Indirect
                Address: 0x93345f8
                Next-hop reference count: 2
                Source: 2.2.2.2
                Next hop type: Router, Next hop index: 554
                Next hop: 2.2.2.2 via em1.0, selected
                Protocol next hop: 2.2.2.2
                Indirect next hop: 93840e8 131070
                State: 
                Inactive reason: Not Best in its group - Update source
                Local AS: 65000 Peer AS: 65000
                Age: 2:13  Metric: 0  Metric2: 0 
                Task: BGP_65000.2.2.2.2+45024
                AS path: I
                Accepted MultipathContrib
                Localpref: 100
                Router ID: 172.20.1.1

root@NewYork> 
Here we can see that also with just the setting up of multipathing our Juniper router will also now load-balanced - the "show route 172.20.1.0 detail" shows this with it's two next hop addresses and also the line "Accepted Multipath".

We can actually do a lot more with load-balancing, we can use unequal bandwidth to load-balance according to the resources at our disposal, or load-balance on a per-packet basis, but as far as simple load-balancing goes, this is pretty much it. It's not hard to set up as I hope this post has shown.

Separating Monitor only and Admin access to Cisco ASDM (ASA) for users authenticated via LDAP

Hopefully this will be the last topic about AAA authentication and Cisco, not because its either unimportant or irrelevant to the CCIE, just because I have spent ages delving into AAA with setting up AAA access to IPS modules on ASA, or catalyst switches, or Nexus switches, and finally I have worked out how to separate admin and read-only access to Cisco ASDM for ASA's via AAA using LDAP.
Continuing the general network security implementation my role centres around, I need to keep a distinct separation of duties as part of our PCI compliance, so when the ticket came in to set up read-only ASDM access to our ASA firewalls for our network operators, I thought, fine, no problem. We already had them authenticate via LDAP both for administration and for AnyConnect VPN access, so it should not be too hard, and as we already have radius set up for the IPS modules and for the Nexus and Catalyst switches, I have two potential methods of implementation available to get this working.

Well, actually it took me longer than I had expected. Through testing I used my own account, and a test account called testnps. My account is a member of sec-fw-admin, and the test account is a member of sec-fw-ro.

Radius as we have seen in previous posts offers the Cisco-AV-Pair which we have successfully used, but try as I might, no matter how successful with getting it to work as required on the CLI, ASDM would always drop the user straight into level 15 access (full rights), or sometimes, no access at all.

So I turned back to LDAP, as I want to avoid implementing TACACS+ for this sole purpose. LDAP has already been working successfully so far, but then its just looking at one security group, an the expected result is either permit or deny, based on whether the user is found in that group. Extending this should therefore not be too hard.

The issues arose from the fact that we have differing levels that need to be addressed, so lets have a look at these.

IETF-Radius-Service-Type

The IETF-Radius-Service-Type can be one of a three values, either 6 which is Administrative and allows full access, 7, which is NAS-Prompt, whereby the user cannot access privileged EXEC mode through the enable command, or 5 which is "Outbound" - meaning no administrative access at all. This page from Cisco's website gives some more information.

ASDM defined user roles

These can be either be 15, offering full access, 5, which is read-only, and 3 which is Monitor Only and only allows access to the monitoring section. To set up the predefined roles from within ASDM click on the button labelled "Set ASDM Defined User Roles" under Configuration > Device Management > Users/AAA > AAA Access > Authorization.

So at the moment I had, in my LDAP attribute map, the IEFT-Radius-Service-Type which was mapped to memberOf, and in turn this references either the sec-fw-admin group at level 7, or the sec-fw-ro at level 6.

TestASA# sh run ldap attribute-map test4
map-name  memberOf IETF-Radius-Service-Type
map-value memberOf "cn=sec-FW-Admin,OU=Security Groups,DC=802101,DC=local" 6
map-value memberOf "cn=sec-fw-ro,OU=Security Groups,DC=802101,DC=local" 5

But this still lets a member of sec-fw-ro in at level 15 on ASDM and the CLI. If you try to re-map memberOf to another value, which would have been the obvious and easy choice, then you quickly find that you can't map it twice to two different attributes.


ASDM attribute mapping


Eventually I found this article on the Cisco website, which pointed me in the right direction. Now the solution in the article is this:


ciscoasa# sh run ldap attribute-map LDAPreadonly
map-name memberOf IETF-Radius-Service-Type
map-value memberOf "CN=Account Operators,CN=Builtin,DC=MCS55,DC=com" 6
map-name sAMAccountName Privilege-Level
map-value sAMAccountName "ashishv" 5
ciscoasa#

There are two issues with this.

One: Members not explicitly stated will be denied access
Two: It does not scale well

So lets solve the second part first.

The method above would mean that for every user with admin access, or with monitor access a seperate entry needs to be explicitly set within the attribute map. This is fine if you only have maybe one, or two, of each and only one firewall, but when you organization scales this means that with every staff change (staff leaving, new staff starting etc) you have to change the attribute map, and potentially with a large number of firewalls this could take some time.

I found a list of AD attribute fields to use, and found one that would usually be unused, and therefore fit for purpose. Hidden away within AD is a comment field. We can find this under Attribute Editor  after enabling Advanced view in ADUC. 


Enable advanced view in ADUC


I added the comment fw-ro for the testnps account.


AD comment field


So now we can, for the appropriate users add this comment in for use in the attribute map.

So implementing this with a slight change to:

TestASA# sh run ldap attribute-map test4
map-name  comment Privilege-Level
map-value comment fw-ro 5
map-name  memberOf IETF-Radius-Service-Type
map-value memberOf "cn=sec-FW-Admin,OU=Security Groups,DC=802101,DC=local" 6
map-value memberOf "cn=sec-fw-ro,OU=Security Groups,DC=802101,DC=local" 5

Results in the testnps account being able to log into ASDM, at the correct level (5), but my own account is denied access:


ASDM privilege level denied


So this takes us back to the first issue, and we must therefore add a second attribute:

TestASA# sh run ldap attribute-map test4
map-name  comment Privilege-Level
map-value comment fw-ro 5
map-value comment fw-rw 15
map-name  memberOf IETF-Radius-Service-Type
map-value memberOf "cn=sec-FW-Admin,OU=Security Groups,DC=802101,DC=local" 6
map-value memberOf "cn=sec-fw-ro,OU=Security Groups,DC=802101,DC=local" 5

I added the comment "fw-rw" to my account, and this works in the desired way, the testnps account has level 5 access and my own account has full admin access at level 15.

So now we have a method to separate admin and monitor only access to the firewall, and it is also scalable within the enterprise environment.


Cisco Nexus and AAA authentication using Radius on Microsoft 2008 NPS

In a previous post I wrote about how to integrate Cisco IPS modules with Microsoft 2008 NPS server, for Radius authentication.

Now we are going to cover how to integrate Cisco Nexus with radius. The format is very similar to the IPS setup, so it may be worth having a read of the first post to get an idea.

We start with some basic assumptions, and one caveat:

Your basic Nexus switch configuration is already in place and can ping your NPS server (via the management vrf)
You already have an NPS server in place serving clients.

I am using the Cisco Titanium Nexus 7000 emulator (but the same process should apply to the NX5000 series, I need to do this on real Nexus 5000's so if there are any differences I will update this post).

Nexus client and profile settings on Microsoft 2008 NPS

We start by adding a client onto the NPS, we give it a friendly name, specify the IP address and set the radius secret (here I am using nxnps123). I have also set the vendor name to Cisco.


Cisco NPS as a Radius client

Cisco NPS as a Radius client

And now we have a client set up:


Cisco NPS as a Radius client

Now we create a policy to map access to the client. I have called this "TestNexus Admin", and the plan will be to have a read only policy added later on.


Nexus Radius policy in NPS

In the next window I start to specify the conditions, and will use the security group "sec-FW-admin", so click on Add to add a condition and select "Windows Groups"


Specifying windows groups for NPS

Now you can add your specific groups.
Next I add the Client Friendly Name, and use the same name I called the client:


Specifying client friendly name in NPS

We keep the default of Access granted and move on till we see the "Configure Authentication Methods", here we select just PAP and SPAP:

Cisco Radius authentication PAP

We can skip the "Configure Restraints" window and move on to "Configure Settings". Here we remove the two options under "Standard"

AAA radius properties

And now we can add a Vendor Specific entry:


Cisco AV pair Nexus radius

And for this entry we will use "shell-roles=*admin" (before anyone says this is wrong, please read the rest of the post to see why I havn't corrected this yet...)


Cisco av-pair NPS Nexus

And that's all the configuration on the Microsoft side (for the moment at least).

Nexus Radius setup and AAA Authentication

Just in case you havn't set up the basics on the Nexus the screenshots below show how to set the management vrf IP, and default routing, as well as confirming reachability to the NPS server:

Nexus basic setup for management

Notice here that we have to specify vrf management in the ping command for it to work

Specifying routing in Cisco Nexus

Now we know that we can "talk" to the NPS box we can start setting up the radius parts.

We start by setting the radius key, it should match the key used to set up the client under NPS (again here we are using "nxnps123"). The 0 next to "key" means that its unencrypted.

Then we set the host (which we should have at least two of for redundancy), and create an aaa group and add the server to this. the last command tells the Nexus to use the management vrf to communicate with the server.


Cisco Nexus radius setup

Now we can tell the Nexus to use radius for authentication, and we also tell it to keep track of errors:


Cisco Nexus AAA authentication setup

Finally, just in case our Radius server is down for any reason, the Nexus should use its local database for login:


Cisco Nexus AAA authentication local fallback
Now we can test login!


Using radius for authentication on Cisco Nexus
It works!

But we can't stop here. Like I pointed out earlier there was an issue with the shell:roles command within the NPS setup.

With the existing configuration we try saving the config:


Cisco Nexus permission denied

So lets look at the privilege levels:


Cisco Nexus privilege levels

Well, -1 was never a good thing in my book. So I changed the AV-pair to "shell:roles=*"network-admin vdc-admin"", logged out, and back in again:


Cisco Nexus copy run start

Now although the displayed privilege level is still showing -1, we can save the config.

Lastly I copied the profile in NPS, changed the Windows Group to one that has people we want with just read only access in it, and changed the role to network operator:


Cisco Nexus radius read-only network-operator

And again we test, this time we are expecting the copy run start to fail


Cisco Nexus Network Operator privilege

Which it does, but they can still issue show commands, so the achieves exactly what is required.

Fallback on Nexus

Lastly we need to make sure that if the radius server is down, we can still get in. I stopped the NPS service and tried logging in. Login failed. I reconnected and tried logging in with the admin username and password, and got in:


Fallback to local authentication if Radius server is down