Radius allows us to use network credentials to access things like routers, switches and, in this case, the IPS modules. Perfect for limiting down the number of local accounts you have across the network.
This is coming as part of my job, so due to the nature of it the images have been edited (not very well I admit) to remove anything pertinent.
Here are the steps for getting the IPS modules on a Cisco ASA, or router to use Microsoft 2008 NPS Server for RADIUS authentication.
Installing NPS
Setting up Microsoft NPS to act as a RADIUS server is pretty easy:1. Start server manager, right-click roles and choose 'add role'.
2. On the Server Roles screen, tick 'Network Policy and Access Server'
3. Click 'next', click 'install' and finally click 'finish'. NPS is installed.
4. Still in the Server Roles screen, right click on the NPS server and register it in AD so that it can read the dial-in properties for a user.
Creating a RADIUS Client
Next we have to define who can talk to the radius server, by creating a radius client1. Expand out RADIUS Clients and Servers->RADIUS Clients
2. Right click on 'RADIUS Clients' and select 'new'
3. Give it a friendly name and enter the IP address. make sure its enabled and enter a shared secret (or generate one - but personally I wouldn't due to the characters it uses, but that's up to you).

Here the client is called IPS01, the ip address is 10.1.1.101 and the shared secret is set to MyS3cr3t.
4. Leave it at RADIUS Standard

5. Click apply and ok.
Next we have to define the connection parameters:
Connection Request Policy
The Connection Request policy controls how a radius client you have created can talk to the radius server, and if certain conditions are met, will allow access.1. On the left side of NPS, go to: Policies->Connection Request Policies
2. Right click on 'Connection Request Policies' and select 'new'
3. Enter a name for the policy so you can identify it.
4. Set the Access Permission to "Grant Access"
5. Leave the type setting below to 'Unspecified'.

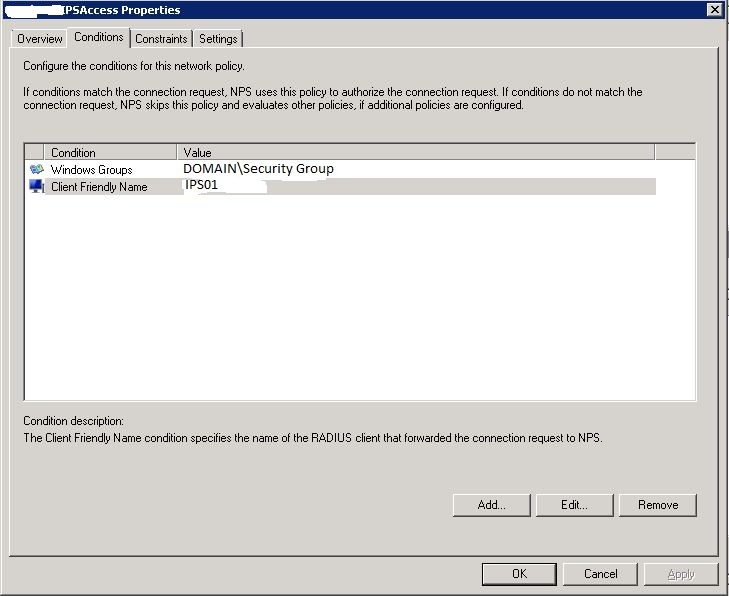
6. Click on conditions and add the conditions you need, specifically the windows group and the client friendly name, which should match the friendly name in the first picture:
7. Click OK
8. On the Conditions tab under "Authentication Methods" un-tick everything apart from "Unencrypted authentication (PAP, SPAP)" - you will get a warning, but ignore this.

9. On the next tab (Constraints) you dont need to tick anything. So go on to settings
10. Under the "Standard" options remove the Framed-Protocol PPP entry and change the Service-Type to "Login"

There is no need to add any Vendor Specific entries (unlike if you were configuring a Catalyst for Radius);

So now you can click on finish and it should look like this:

Configuring the IPS for RADIUS
Now on IME you can set up the IPS to use Radius.1. Under Sensor Setup > Authentication set "User Authentication" to Radius Server.
2. Use the same Network Access ID as the friendly name you set in the first screenshot, setting the Default User Role to Administrator.
3. Make sure that "Allow local Authentication if all Radius Servers are Unresponsive" is ticked, just in case the Radius servers are down.
4. Enter the server address of the NPS server, and set the Shared Secret to the same as you entered in step one, where you added the Radius Client to NPS.
5. Lastly set the Console Authentication to RADIUS and Local:

6. Click on apply, and thats it!
You should now be able to use SSH, or connect using ASDM, or IME using your domain credentials.